


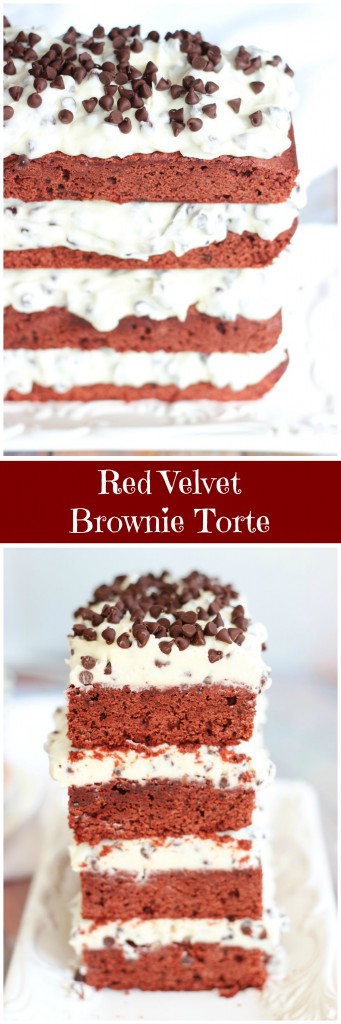
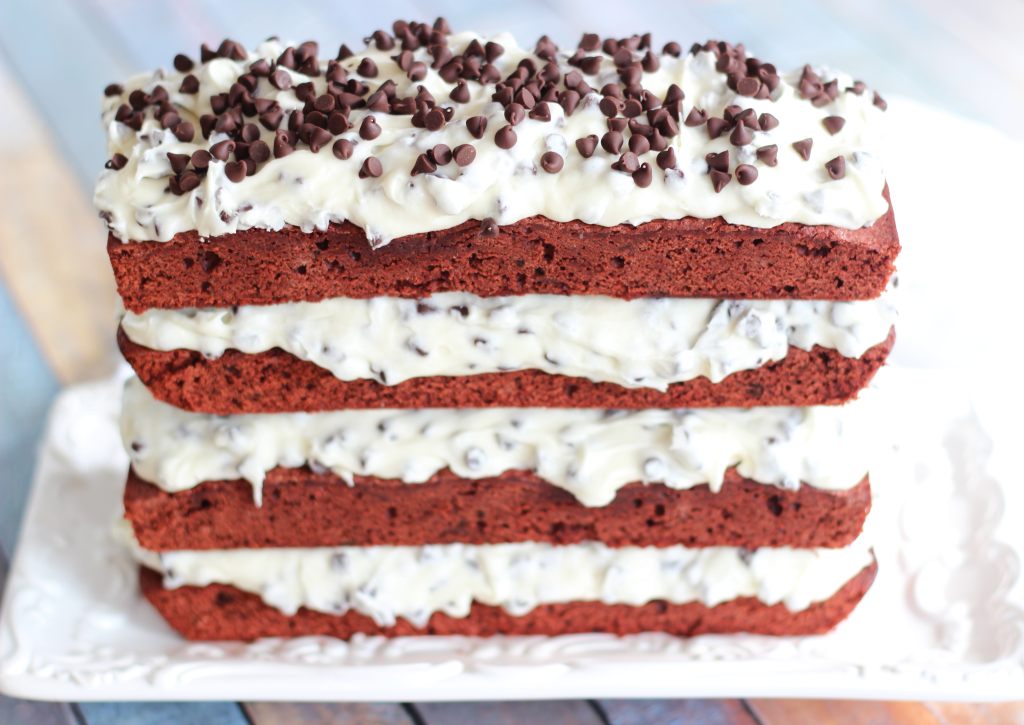
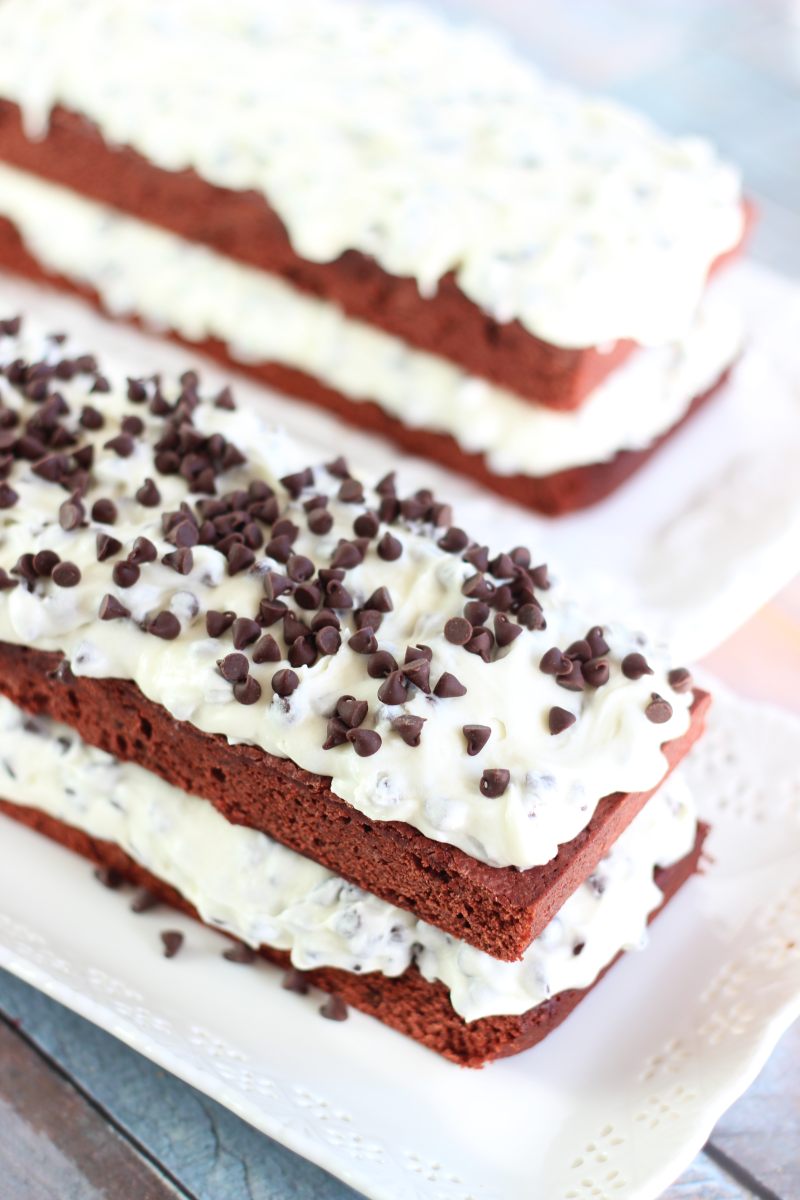
Red Velvet Brownies are layered with Chocolate Chip Cream Cheese Buttercream for an ultra-decadent holiday dessert that is certain to impress! With a little finesse, this Red Velvet Brownie Torte is easier than it looks!
It feels unreal to be posting a Christmas-y recipe! As excited as I am for Christmas, I’m not mentally ready for it to be here so soon. Then again, who is? It’s just over a month away though, and it’s coming whether I’m ready or not. And although I had no qualms about posting pumpkin recipes for months now, I’m having a hard time turning the corner into straight-up Christmas recipes.
I’ve been getting out Christmas decorations for over a week, and I have a long way to go. To the rest of the world, it’s not normal to have Christmas decorations up yet, but in my world, I’m late to the game. I like to start on them in early November!
When it comes to watching Christmas movies and listening to Christmas music though, I’m on top of things. And when it comes to Christmas baking, I’m quite on top of things. It’s just the fact that it’s time to actually start sharing those Christmas recipes now. Already??? Well, let’s do this!
This Red Velvet Brownie Torte is inspired by what is quite possibly my very favorite recipe on the blog: my Peanut Butter Cup Brownie Torte. Slabs of fudgy brownie are layered with peanut butter buttercream and peanut butter cups in that dessert. It’s incredible. With Christmas rapidly approaching (eek!), I wanted to recreate that recipe with a holiday flair!
Red Velvet always feels festive and Christmas-y to me, and what better to pair it with than cream cheese buttercream? They are a classic duo. I used this tried and true recipe for from-scratch Red Velvet Brownies, and my favorite recipe for cream cheese buttercream to create this Red Velvet Brownie Torte.
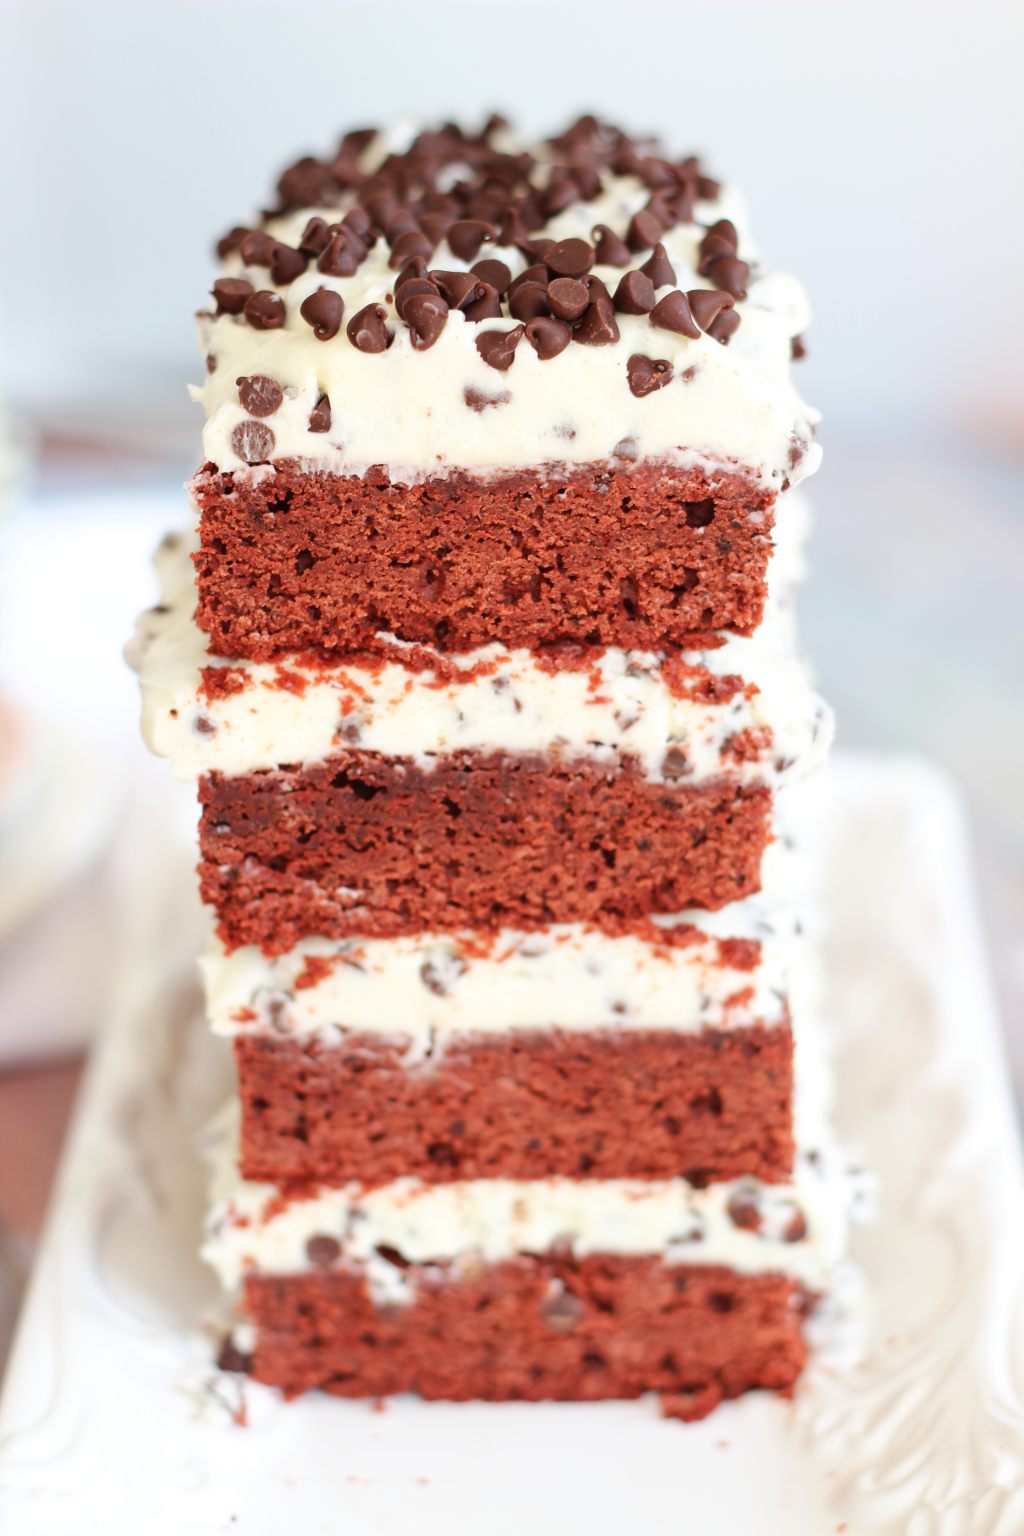
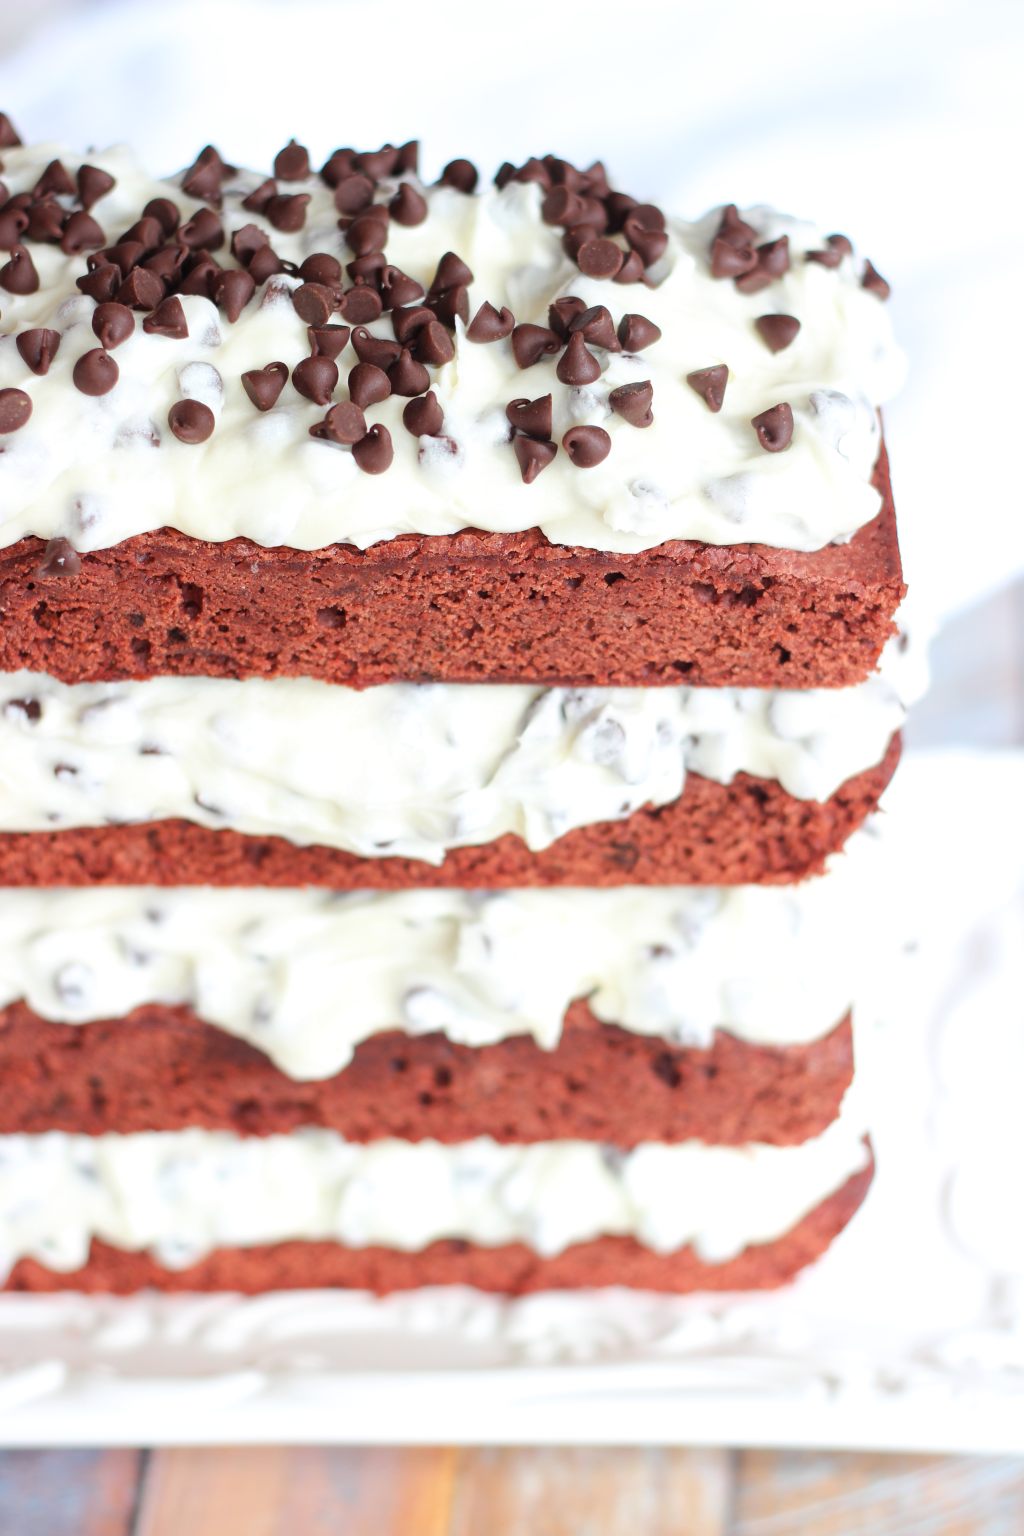
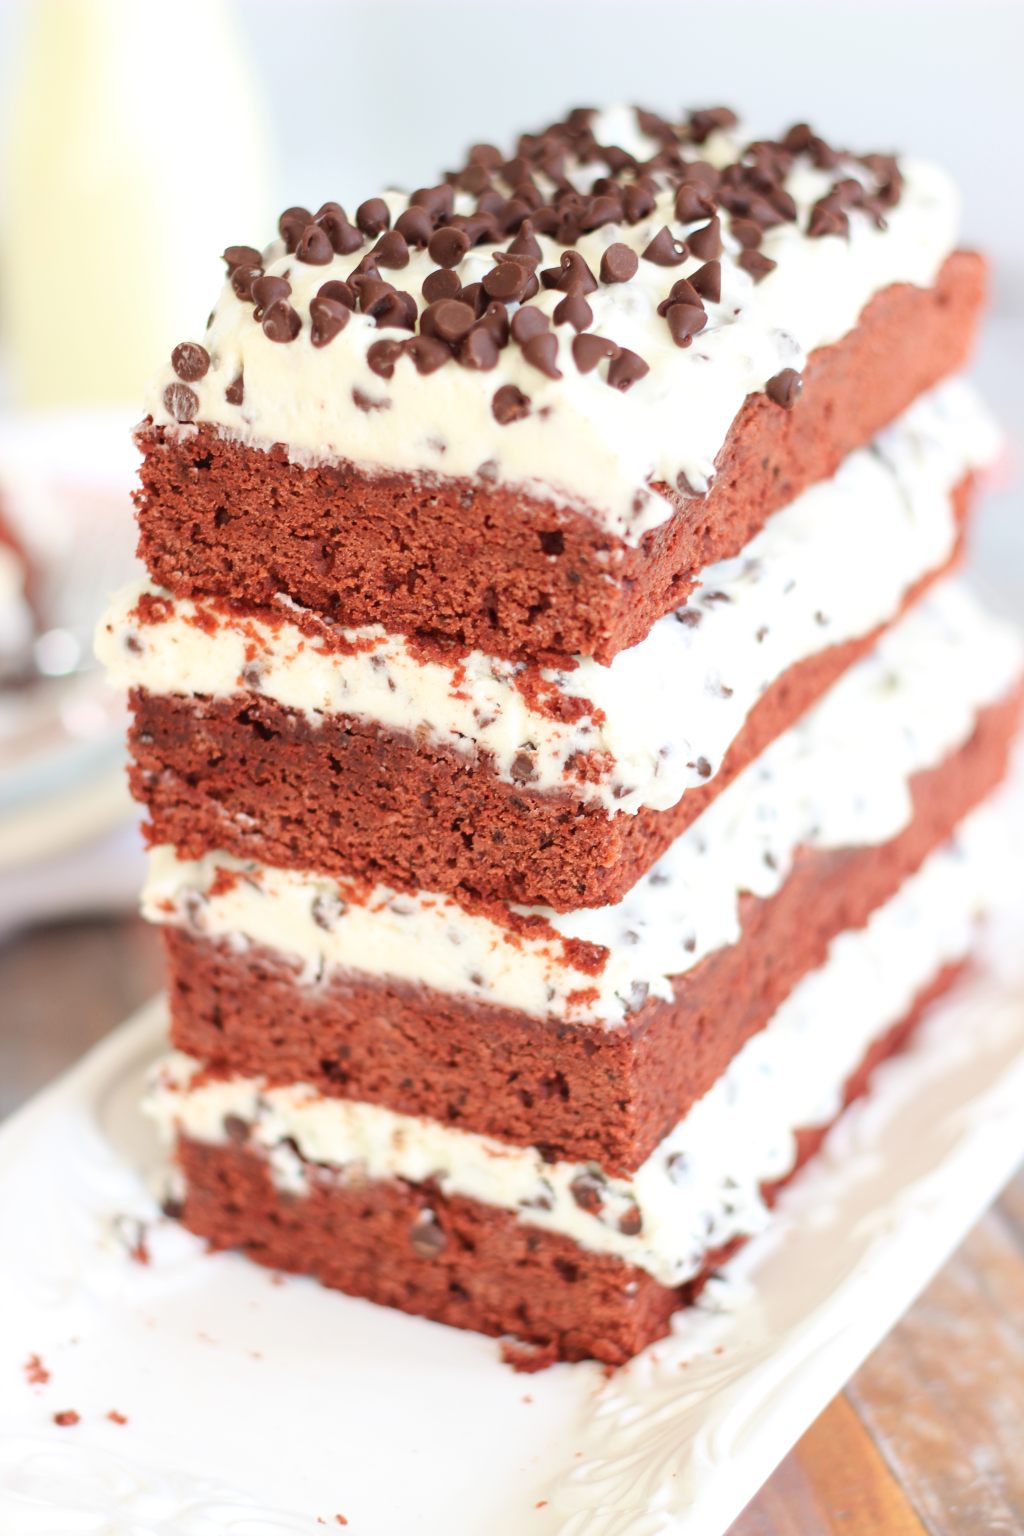
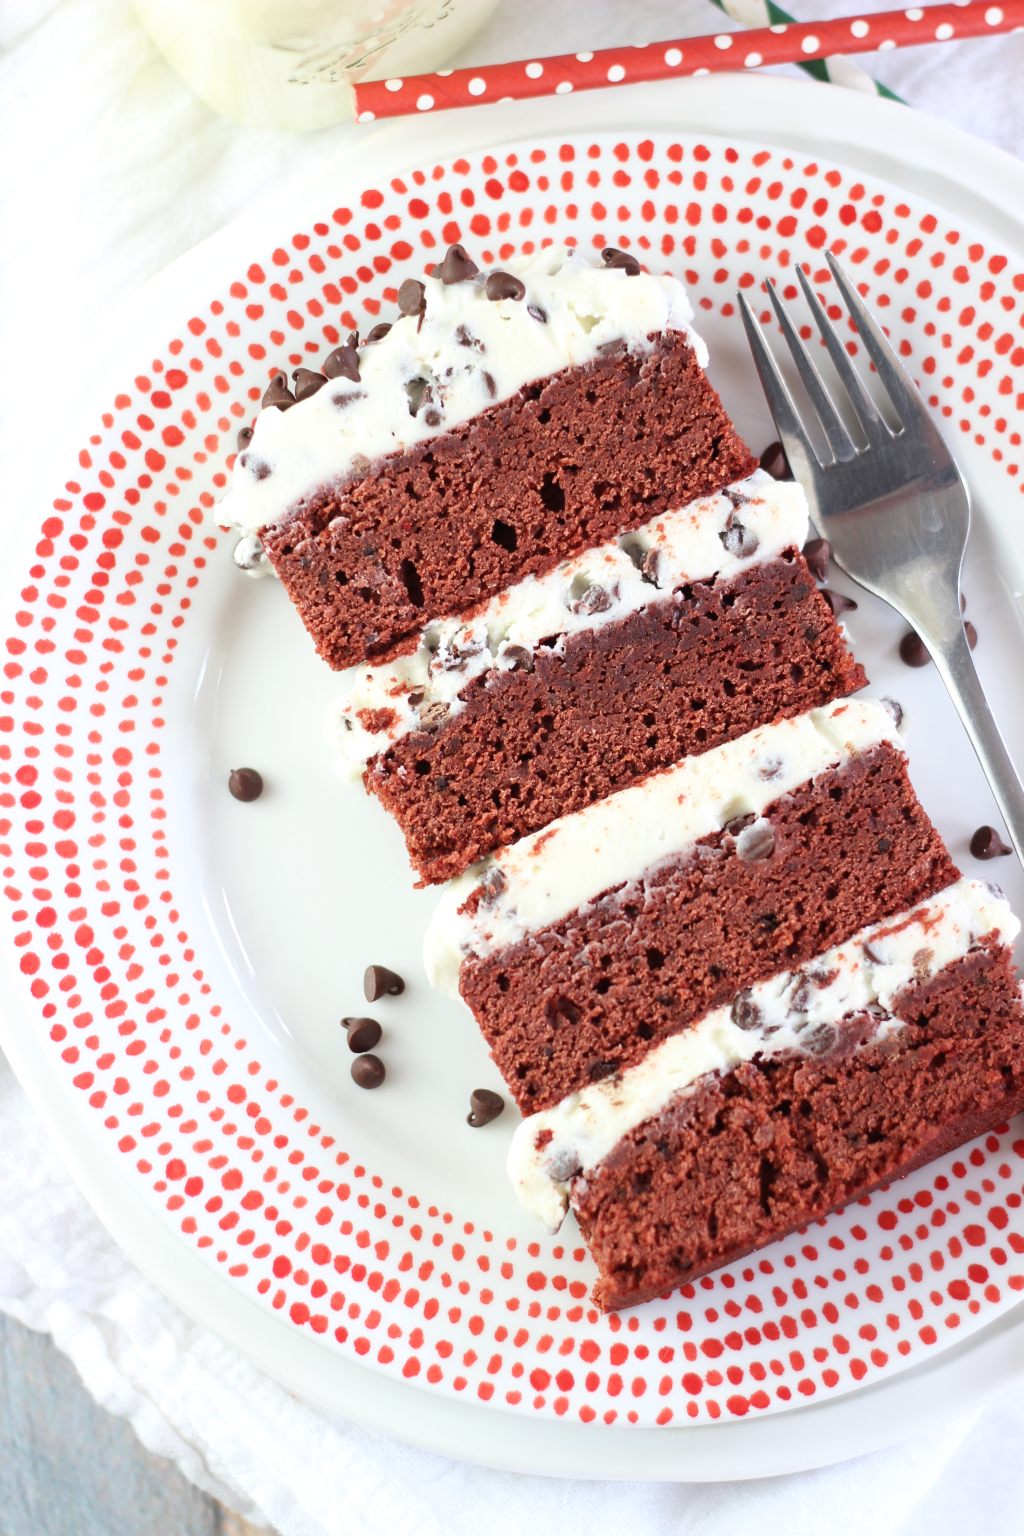
These vibrant and pretty brownie layers are soft and airy, but still somehow fudgy and rich. The crumbs are moist, and the brownies have that hallmark subtle chocolate flavor, with a side of butter and vanilla! Not to be overlooked, the cream cheese frosting is to-die-for. It’s fluffy and creamy, and the cream cheese flavor is the perfect complement to the light cocoa flavor of the brownies.
Don’t forget the chocolate chips. They add a little crunchy texture to each bite initially, but then the silky chocolate melts in your mouth blending beautifully with the tangy cream cheese frosting and the fudgy brownies!

Red Velvet Brownie Torte
Ingredients
For Red Velvet Brownies:
- 1 c. butter melted, slightly cooled
- 2 c. sugar
- 2 tsp. vanilla
- 1/3 c. cocoa powder
- 4 tbsp. red food coloring
- 2 tsp. vinegar
- 4 eggs
- 1 1/2 c. Bob's Red Mill Organic Unbleached All-Purpose White Flour
For Chocolate Chip Cream Cheese Frosting:
- 1/2 c. butter softened
- 1 - 8 oz. package reduced-fat cream cheese softened
- 4 c. powdered sugar
- 2 tsp. vanilla
- 2 c. mini semi-sweet chocolate chips divided
Instructions
- In a large mixing bowl, combine butter, sugar, vanilla, cocoa powder, red food coloring, and vinegar, beating until blended.
- Beat in the eggs.
- Beat in the flour, and mix until just combined.
- Pour into a greased 9x13-inch square pan.
- Bake at 350 degrees for 20-25 minutes, or until a toothpick inserted near center comes out clean.
- Allow to cool completely on a wire rack.
- Meanwhile, prepare frosting.
- In a large mixing bowl, combine butter and cream cheese, beating until smooth and creamy.
- Add powdered sugar and vanilla, beating until fluffy, about 5 minutes.
- Fold in all but 1/4 c. mini chocolate chips, reserving the 1/4 c. for garnish.
To assemble:
- Cut the tray of brownies horizontally into 4 pieces. They will each be approximately 9x3 inches. We're going to make two sets of two brownie layers first, and we'll firm them in the fridge. Then we will put those two shorter tortes together into one mega-torte.
- So, on a serving platter, carefully lift out and place one of the brownie pieces.
- Spread about 1 c. cream cheese frosting onto the brownie layer.
- Carefully top with a second layer of brownie, and top that with 1 c. cream cheese frosting.
- We'll leave this one on the serving platter, and will add to it later. It will then already be on a serving platter when we are ready to cut and serve.
- On a baking sheet, place the 3rd of 4 brownie pieces.
- Spread about 1 c. cream cheese frosting onto the brownie layer.
- Top it with the 4th and final brownie piece.
- This will ultimately be the top layer, so spread it with cream cheese frosting, and top it with 1/4 c. mini chocolate chips for garnish.
- Refrigerate both these smaller tortes for at least 1 hour, or until frosting is firm. We want the frosting very firm because it's going to get heavy when we assemble the two shorter tortes together.
- Once firm, carefully lift the brownie torte from the baking sheet on top of the brownie torte on the serving platter. Gently press to adhere the two layers. The frosting layers will be firm so that they won't smoosh under the weight, but since it's firm, we want to gently press so that they stick.
- When you cut the first piece, it will 'solidify' the pieces altogether. To cut, make sure to hold a hand vertically against the edge as you cut so that the 4 pieces don't come apart.
- Store in refrigerator. EAT!!!


Gorgeous! Look at those THICK layers of filling. Oh, my. This is such a perfect dessert for the holiday season, Sarah!
Thank you! It’s one of my favorite recipes on the blog, for sure!
Oh my goodness, Sarah! This brownie torte is out of this world. Just look at all those layers. I’m in red velvet heaven!